This post contains affiliate links

Do you remember Shrinky Dinks? They were one of my favorite toys as a little girl and I ALWAYS have some on hand. You can create SO many awesome projects with this stuff, but today I am talking about my famous custom keychains. This all started when my son said he really wanted a certain Pokemon character keychain, but it wasn’t sold anywhere. So I casually offered to make him one using Shrinky Dinks and it was a huge hit. Not only with my sweet son, but with ALL of his friends. That is when my unintentional and unpaid business of creating custom keychains for all the elementary school students at my son’s school was born.
When Hudson is invited to a birthday party, the child puts in his keychain order. Minecraft, Legos, Pokemon… you name it and I’ve made it! Backpack “flair” is extremely important with kids and my keychains are a hot commodity. I have been making these for awhile, but I have been getting so many requests, I figured I should put them on the blog since they seem to make kids very happy. They are also super easy to make and so much fun.
You will need:
- Shrinky Dinks (they sell Clear if you want to use Sharpies and Frosted if you want to use markers or colored pencils, which are the ones I prefer)
- Colored Pencils
- Hole Punch
- Keychain Attachment (I used these, however these also work but are a bit more expensive)
- Clear Nail Polish
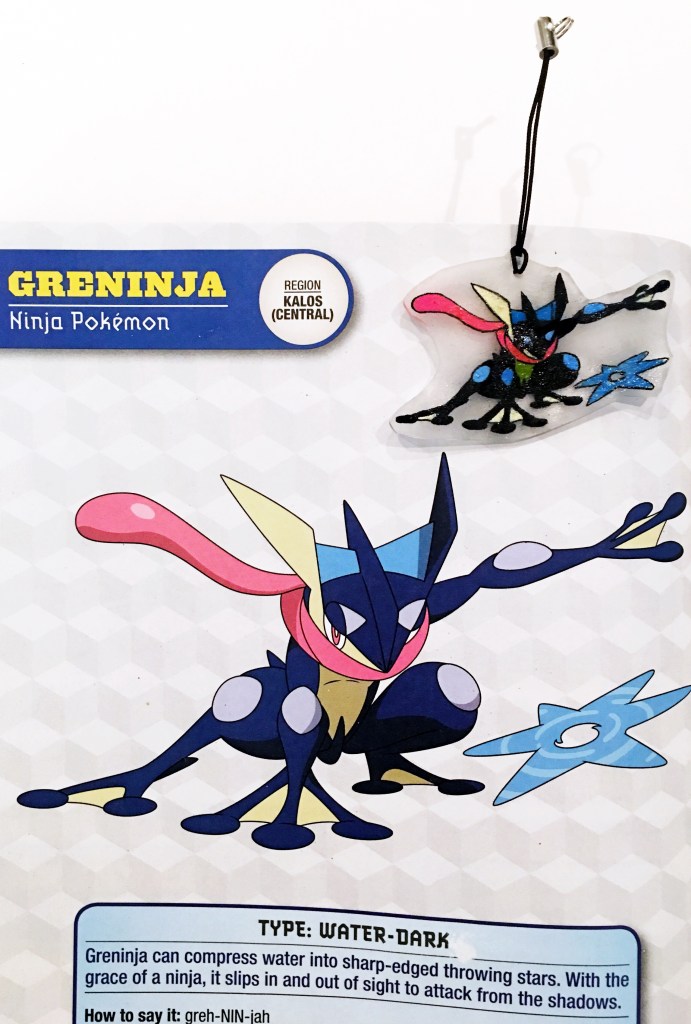
For this project, I usually trace the pictures out of my kids books. You can also print out what you want to make and just trace that. Cut out your Shrinky Dink paper and tape it over the picture, rough side up. (there is a smooth side and a textured side, you want to color on the textured part) I like to trace the whole picture in black, then color it all in. It looks more defined that way. When you are done, cut out your picture but be sure to leave room for a hole to loop your keychain through. A hole punch works perfectly since it shrinks up small enough so it is not noticeable but will still fit the keychain attachment. You don’t want any sharp edges or thin sections. These will be hard once complete, and you don’t want a sharp or pointy edge since it could hurt someone or snap off easier.
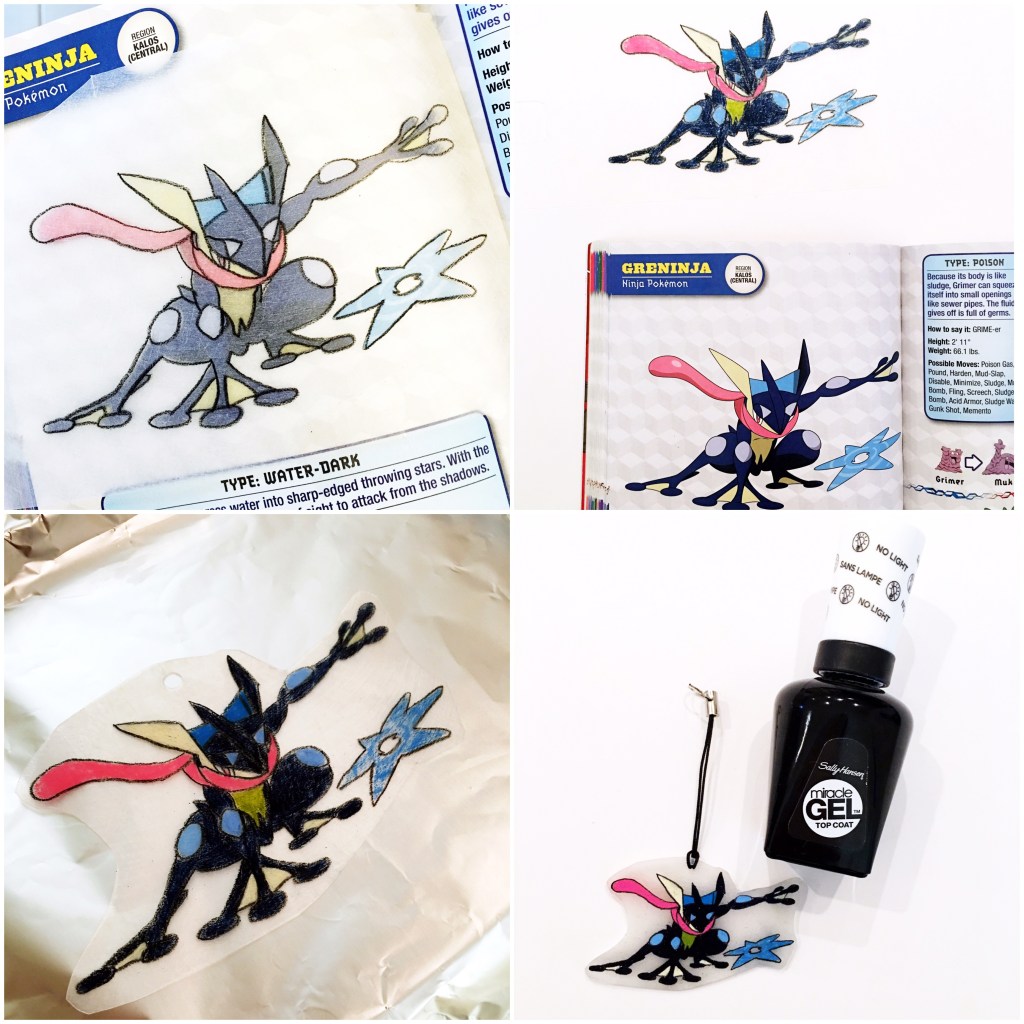
Once your picture is ready, preheat your oven to 325. Place your picture on a flat baking sheet covered with foil. Pop it in the oven and WATCH IT. Don’t go anywhere. It takes just a few minutes for the magic to happen. At first, your masterpiece will curl up, but don’t worry it will flatten out. Once it gets flat again, wait 20 seconds more and then take it out of the oven. I like to grab a potholder and push it down while it is still hot, to make sure it gets really flat. Once it cools, paint the rough side with a thin layer of clear nail polish. You don’t need to do this if you used permanent markers, but sometimes the colored pencils can rub off and this prevents that from happening. Once that dries, just attach your keychain and you are DONE!
There are tons of crafts you can make with Shrinky Dinks, I seriously think they are the most awesome thing ever. (this is not sponsored or anything, I just really love shrinking stuff) We have made name necklaces, bracelets, hair clips, cupcake toppers… I could go on and on! Do you remember Shrinky Dinks?


I love Shrinky Dinks! It has been way too long since i have done this with the kiddos. Adding this to the summer bucket list right now.
P.S. This post made me happy, How can Shrinky Dinks not? Anyways, I would love if you came over and linked this up at my weekly linky, The Happy Now 🙂
Yes we just did these! And I failed at them, but thankfully you guided me through!! Such a good idea!
I think it’s so creative!! I need to try one, not sure if i will make it properly but anyway, i would be very proud of myself! ahah
I haven’t seen shrinky dinks in years! I remember doing these as kids and having a blast! What a fun idea!
This looks like it would make a fun summer break project!
I love Shrinky Dinks! My sister has two kiddos who were have a blast making these!
I wasn’t cool enough for these, but with two kids at home I can work on building up my status. I laughed so hard at the beginning of your post. I imagine Magic Mom on the corner with a cigarette hanging out of her mouth and sunglasses resting in the edge of her nose as she doles out her latest shrinky dink designs in little plastic baggies. BAHAHAHA! I’m weird, I know.
omg-i LOVED shrinky dinks as a kid!! but i totally forgot about them! thanks for the reminder that i need to introduce them to my kids! 🙂
These are so much fun. I think this might be a good summer project for my girls (on a not too hot day). Thanks for sharing 🙂
Such a fun project! I’m sure the kiddos absolutely loved it!
– Elise
These are awesome! I feel sad that I’ve never heard of these…
How fun! I love exposing my kiddo to things I enjoyed as a kid!
shrinky dinks are total nostalgia! love it!
Oh man childhood flashbacks. Used to make these all the time.